
Webmail Preferences
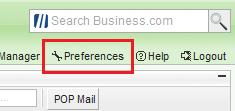
To get into the webmail preference, log into http://easystreetemail.com. Then click the Preferences link in the upper right corner as seen below:
General
Security Settings
- Change Password
- Enter your old password.
- Enter your new password and confirm it.
- Click Save.
- Session Timeout
- Set the idle timeout, in minutes, to the desired lenght of time. Default is 30 minutes.
- Secret Question/Answer
- Select your secret question.
- Enter the secret answer.
- Click Save.
Regional Settings
- Select Time Zone
- Select Date format
- Select Time format
- Click save.
Layout Settings
- Select Autosave settings
- Click save.
My Day
Notifications
- Select Display Settings
- Select delete notification value.
- Select number of notifications to display.
- Special Event Notfications
- Select interval for removing Special Event Notifications.
- Click Save.
General Settings
- Viewing Emails
- Select the number of emails you would like to display on a page.
- Enable or disable the preview pane, which permits you to view or display an email below the list of emails in a folder.
- New Message Notifications
- Select the frequency of new email notifications. These notices pop-up when new messages are received.
- Composing Emails
- Choose whether or not you save outgoing emails to your Sent folder.
- Select the email composer (Rich text or plain text) for each new message you compose.
- HTML display preferences to be inline with text, or as an attachment.
- Choose the auto-save preferences for composing email; select the desired time frequency and option to save to the Drafts folder.
- Cleanup
- Choose to automatically delete messages in the Trash folder at a specific time frequency.
Name and Signature
- Name
- Enter your name exactly as you desire it to appear.
- The name you enter will be the same name that appears in a person’s inbox.
- Signature
- Unless this feature is disabled, your signature will automatically be attached to every email you send.
- Your signature may consist of any information, including contact information, website, phone, etc.
- Sender Address
- To select or set the alias from which your emails are sent, select an address (from the list of available aliases) to use as a default.
POP3 Accounts
If you have a secondary email address that supports POP3 access, your webmail can retrieve the email and place it in your webmail inbox.
Note: Before you proceed further, you will need to have your server settings, username, and password. If you do not have this information, please contact your Internet Service Provider or System Administrator.
- Click on Preferences.
- Click on POP3 Accounts.
- Click on Create POP Account.
- Fill in the required information:
- Account: Enter a general description of this account, such as Home Email Account.
- Mail Server: Enter the name of the server. You can get this information from your System Administrator, or by contacting the Support Department for this email account.
- Username: Enter your Username for this email account.
- Password: Enter your Password for this email account.
- Timeout: Enter the number of seconds by which the server must respond.
- Port: Enter the POP3 port number. (Port 110 is the standard POP3 port).
- Leave Messages On Server: Use the drop-down list to select ‘Yes’ or ‘No’.
- Note:
- Selecting ‘Yes’ will allow you to view the messages from both your webmail account, and from the original email account servers.
- Selecting ‘No’ will remove the email message from your original email account server.
- Note:
- Click Save after all the information has been entered.
Junk Mail Controls
- Junk Mail Restriction
- Set your Junk Mail threshold on a scale of 0-10, with 0 being the least restrictive setting. If you are receiving junk mail in your inbox, increase this setting. If valid mail is going to your Junk mail folder, lower your setting.
- Images included in an email will be received as an attachment if you choose to hide embedded images. Otherwise, they may come through in your email as they had been sent.
- Safe List and Block List
- When you add an email address or domain to your Safe list, it will never be delivered to your Junk mail folder. Click Add to make an entry, or highlight an address and click Remove to delete from your Safe List.
- When you add an email address or domain to your Block list, it will always been delivered to your Junk mail folder. Click on Add to make an entry, or highlight an address and click Remove to continue receiving email from this address or domain in your inbox.
- Any messages that are flagged as Junk in your inbox will automatically be added to your Block list.
- Cleanup
- When you flag a message as Junk, it will be moved to your Junk mail folder from the inbox, or deleted. Choose which action you would like to happen.
- Set the frequency of deleting Junk mail automatically to your preference.
- Handling Inbound Junk
- Choose where you would like Junk mail to be delivered. It will normally go to your Junk mail folder, but if you are a POP user, it is recommended that it be delivered to your inbox and tagged as SPAM.
Spell Check Options
- Dictionary
- Choose between the American, Canadian, UK and Australian English dictionaries according to your geographic location.
- User Dictionary
- Add words that are commonly used, but not misspelled and should be ignored by default when using Spell Check.
- Spell Check Options
- Customize your spell check by indicating what should or should not be caught and reported by spell check.
Message Filters
To set up a Message Filter to have your incoming emails directed to a folder within your email folder tree, or forwarded to an external email address, please follow the steps below.
- To add a filter:
- Click Add.
- Name the filter you wish to create. (i.e. sales inquiries)
- Specify the traits of a message that should be filtered with the following options:
- Subject
- Message
- Sender Name
- From Address
- To Address
- Virus-infected attachment(s) removed
- Choose to either move the message or copy it to another folder within your Email, or forward the message to another address.
- Click Save when your preferences have been completed.
- To Edit a filter:
- Click Edit.
- Make the appropriate changes to the filter you would like to change, and click Save.
- To view a filter:
- Highlight the name of the filter to view how they are filtered, and the resulting action.
- To Remove a filter:
- Highlight the filter you wish to delete and click Remove.
Out of Office Message
If you will be out of the office for a holiday, vacation, or other circumstance, set an auto-responding Out of Office message to alert those who try to contact you via email.
- Indicate specific start and end dates, or set your message to begin now and end indefinitely to turn off later.
- You may use the default Out of Office message by clicking Use Default Message, which looks like this:
- I am currently out of the office and will not be checking e-mail. I will reply to your message as soon as I return.
- You may also customize your message to include emergency contact information, or any other important information.
- I am currently out of the office and will not be checking e-mail. I will reply to your message as soon as I return.
- To turn your Out of Office Message on, click Turn Out of Office Message On.
- When you return to the office and would like to turn this message off, go to the Out of Office Message option in the Preferences menu and select Turn Out of Office Message Off.
Forwarding
To forward all incoming email to an external address:
- Turn On Email Forwarding.
- Enter the address your email should be delivered to.
- Indicate if you would like to leave a copy of the message in your BlueTie account by checking the box.
- Click Save.
Marketing Campaign
To use your Constant Contact account:
- Enter your username and password.
- Click Save.
Contacts
General Settings
- Select number of contacts per page
- Indicate whether you would like the Preview pane on or off.
- Click Save.
Save New Addresses
- Check sent mail for new addresses select Yes or No.
- Select where to save new addresses.
- Click save.
Calendar
General Settings
- Enter your Calendar name.
- Select the default view.
- Set your default reminder interval.
- Check the type of notification you would like.
- Specify your work week.
- Specify your Work Day hours.
- Select your first day of the week.
- Configure your Time block increments.
- Set your free/busy access. (enabled or disabled)
- Click save.
Holidays
- Select Holidays by country.
- Select Holidays by religion.
- Click save.
Travel Settings
- Customize your Flight Search Defaults.
- Select your Flight Results Defaults.
- Select your Hotel Search Defaults
- Click save.